外行人浅测一下高德的视频转 3D 空间工具 ABot-Recon
起因

自 2022 年把以前拍的行车记录 POV 视频发到网上,收获不少流量后,我拍了不少行车 POV 视频。虽然发出来都加速,但是考虑到将来可能有别的用处,我还是保存着原始的视频。于是,这些视频就累积到了 10 个多 TB。
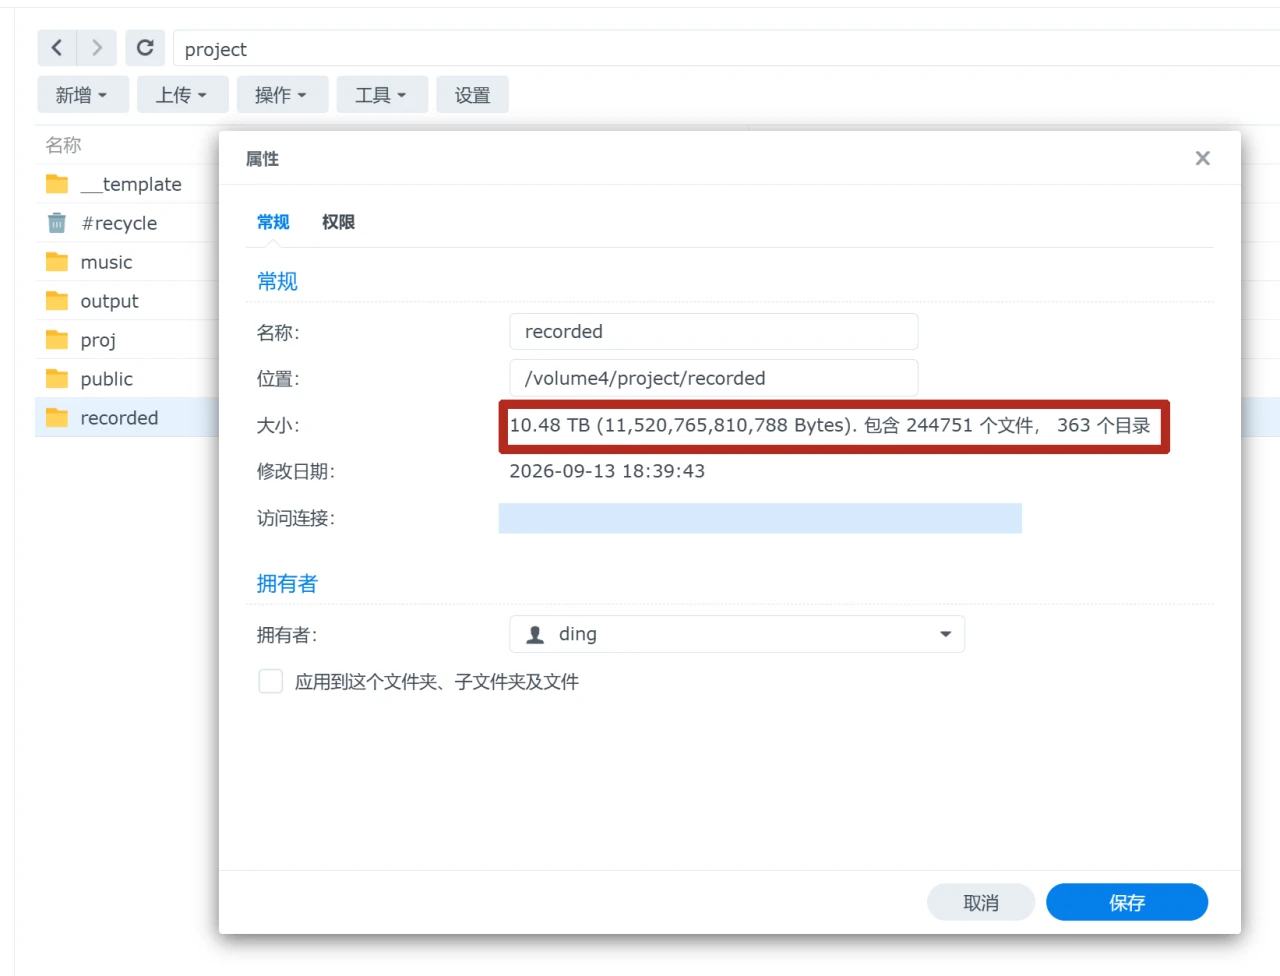
积累的视频文件

至于“别的用处”,我倒是想把这些视频打包卖给需要做街景数据分析的企业,但是我也不知道渠道,也不知道有没有企业愿意买,毕竟只是非专业的单方向画面。对于我,2023 - 2024 年的时候,我把这些分段视频按项目合并起来,缩小到 1080P,然后使用 kplayer,24 小时直播回放这些行车视频。当然后来哔哩哔哩不允许这么做了,同时还提高了用推流码直播的门槛,于是也搞不下去了。

时间到了 2026 年 9 月。我偶然看到高德发布了 ABot-Recon,可以通过图片序列转 3D 空间,示例里面就有将行车 POV 视频的转换效果。我想着自己有那么多这样的视频资源,不用这种工具实在是可惜——实际上我还想尝试搞驾驶游戏,场景用真实的街景数据生成。

高德在 HuggingFace 上提供了 Demo,用户可以上传视频,生成结果。视频要求 12 fps,我为了减少空间,就找了自己的一个行车视频,缩小到 1080P,按要求转码了。不过,线上 Demo 只支持非常小一部分的展示,需要看实际效果还是在本地运行好一些。
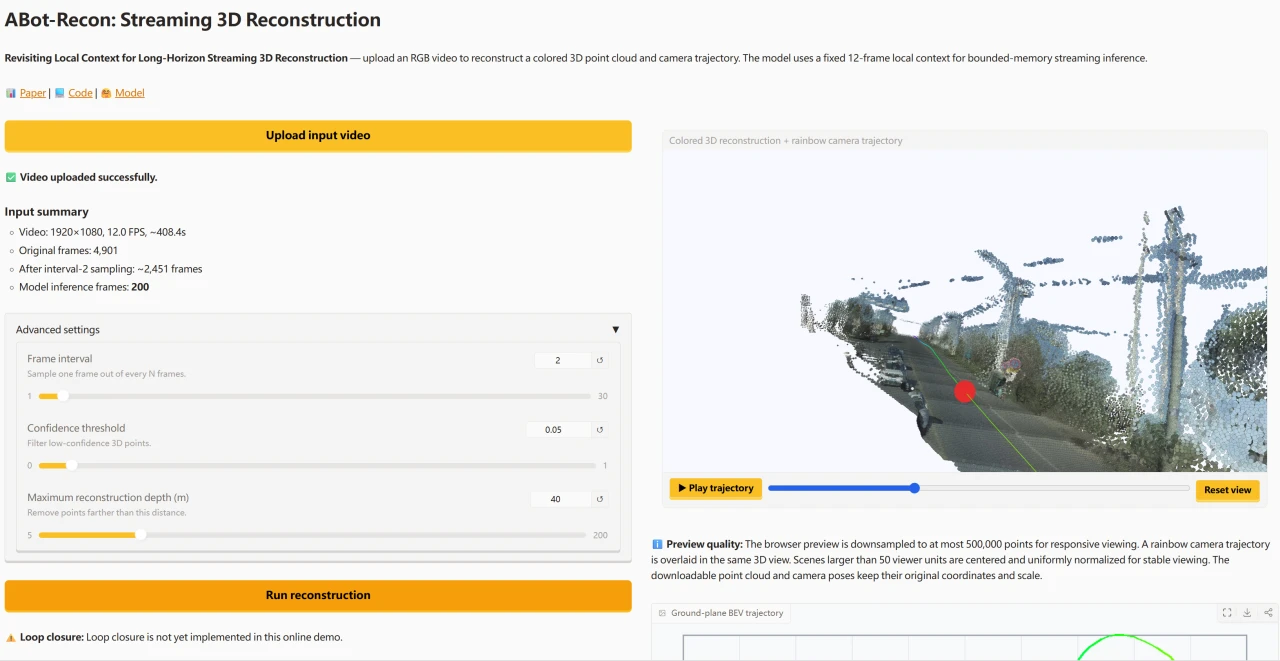
在线 Demo

适配之路

9 月末,权重发布,我下载了代码和权重文件,拿上面提到的视频测试。

我用的显卡是 NVidia RTX 4060 Ti,显存 16 GB。官方用的 A100、H100,个人想都不要想了。我也只是抱着试一试的心态测试能不能在我这张显卡上跑通。不过,我对这种大模型相关的项目几乎是一窍不通,多亏 AI,我才得以快速实现自己想要的功能。

尽管 Demo 是上传视频获得结果,但是 README 里面的输入方式只提供了图片序列这一个方式。明明读取视频就是把它拆成图片序列就行了。我就让 AI 帮忙扩展了功能,使其能够读取视频。

之后就是 PyTorch 的问题了。如果按项目提供的依赖,默认装的是 CPU 版本的 PyTorch,需要自己安装 CUDA 版本的。

然后依然报错:

1
2
3
4
5
6
7
8
9
10
11
12
13
14
15
16
17
18
19
20
21
22
23
24
25
26
27
28
29
30
31
32
33
34
35
36
37
38
39
40
41
42
43
44
45
46
47
48
49
50
51
52
53
54
55
56
57
58
59
60
61
62
63
64
65
66
67
68
69
(ABot-Recon) PS D:\code\ABot-Recon> python demo.py `
>> --video E:/DJI_0001_min.mp4 `
>> --output-dir outputs/demo `
>> --attention-backend auto `
>> --device cuda `
>> --no-loop-closure
Warning, cannot find cuda-compiled version of RoPE2D, using a slow pytorch version instead
[Pi3] model.ckpt is None — no pretrained file load.
[ABotReconNetwork] attention=causal-window window_frames=12 position_encoding=rope3d
[ABotReconNetwork] gate_layers=[0, 1, 2, 3, 4, 5, 6, 7, 8, 9, 10, 11, 12, 13, 14, 15, 16, 17, 18, 19, 20, 21, 22, 23, 24, 25, 26, 27, 28, 29, 30, 31, 32, 33, 34, 35] (elementwise, bias=True, init bias=5.0)
ABotReconNetwork stream: 0%| | 0/4901 [00:00<?, ?frm/s]D:\code\ABot-Recon\abot_recon\modeling\pi3\models\layers\attention.py:181: UserWarning: Memory efficient kernel not used because: (Triggered internally at C:\actions-runner\_work\pytorch\pytorch\builder\windows\pytorch\aten\src\ATen\native\transformers\cuda\sdp_utils.cpp:773.)
x = scaled_dot_product_attention(q, k, v)
D:\code\ABot-Recon\abot_recon\modeling\pi3\models\layers\attention.py:181: UserWarning: Memory Efficient attention has been runtime disabled. (Triggered internally at C:\actions-runner\_work\pytorch\pytorch\builder\windows\pytorch\aten\src\ATen/native/transformers/sdp_utils_cpp.h:558.)
x = scaled_dot_product_attention(q, k, v)
D:\code\ABot-Recon\abot_recon\modeling\pi3\models\layers\attention.py:181: UserWarning: Flash attention kernel not used because: (Triggered internally at C:\actions-runner\_work\pytorch\pytorch\builder\windows\pytorch\aten\src\ATen\native\transformers\cuda\sdp_utils.cpp:775.)
x = scaled_dot_product_attention(q, k, v)
D:\code\ABot-Recon\abot_recon\modeling\pi3\models\layers\attention.py:181: UserWarning: Torch was not compiled with flash attention. (Triggered internally at C:\actions-runner\_work\pytorch\pytorch\builder\windows\pytorch\aten\src\ATen\native\transformers\cuda\sdp_utils.cpp:599.)
x = scaled_dot_product_attention(q, k, v)
D:\code\ABot-Recon\abot_recon\modeling\pi3\models\layers\attention.py:181: UserWarning: CuDNN attention kernel not used because: (Triggered internally at C:\actions-runner\_work\pytorch\pytorch\builder\windows\pytorch\aten\src\ATen\native\transformers\cuda\sdp_utils.cpp:777.)
x = scaled_dot_product_attention(q, k, v)
D:\code\ABot-Recon\abot_recon\modeling\pi3\models\layers\attention.py:181: UserWarning: CuDNN attention has been runtime disabled. (Triggered internally at C:\actions-runner\_work\pytorch\pytorch\builder\windows\pytorch\aten\src\ATen\native\transformers\cuda\sdp_utils.cpp:528.)
x = scaled_dot_product_attention(q, k, v)
ABotReconNetwork stream: 0%| | 0/4901 [00:01<?, ?frm/s]
Traceback (most recent call last):
File "D:\code\ABot-Recon\demo.py", line 228, in <module>
main()
File "D:\code\ABot-Recon\demo.py", line 224, in main
run_reconstruction(args, images)
File "D:\code\ABot-Recon\demo.py", line 191, in run_reconstruction
result = model.infer(
File "D:\code\ABot-Recon\.venv\lib\site-packages\torch\utils\_contextlib.py", line 116, in decorate_context
return func(*args, **kwargs)
File "D:\code\ABot-Recon\abot_recon\api.py", line 130, in infer
output = self.model.infer_paths(paths, **inference_kwargs)
File "D:\code\ABot-Recon\.venv\lib\site-packages\torch\utils\_contextlib.py", line 116, in decorate_context
return func(*args, **kwargs)
File "D:\code\ABot-Recon\abot_recon\model.py", line 170, in infer_paths
output = self.network.inference_stream_iter(
File "D:\code\ABot-Recon\.venv\lib\site-packages\torch\utils\_contextlib.py", line 116, in decorate_context
return func(*args, **kwargs)
File "D:\code\ABot-Recon\abot_recon\modeling\streaming\network.py", line 1421, in inference_stream_iter
pred = self.forward(
File "D:\code\ABot-Recon\abot_recon\modeling\streaming\network.py", line 626, in forward
hidden = self.encoder(imgs_bn, is_training=True)
File "D:\code\ABot-Recon\.venv\lib\site-packages\torch\nn\modules\module.py", line 1736, in _wrapped_call_impl
return self._call_impl(*args, **kwargs)
File "D:\code\ABot-Recon\.venv\lib\site-packages\torch\nn\modules\module.py", line 1747, in _call_impl
return forward_call(*args, **kwargs)
File "D:\code\ABot-Recon\abot_recon\modeling\pi3\models\dinov2\models\vision_transformer.py", line 332, in forward
ret = self.forward_features(*args, **kwargs)
File "D:\code\ABot-Recon\abot_recon\modeling\pi3\models\dinov2\models\vision_transformer.py", line 268, in forward_features
x = blk(x)
File "D:\code\ABot-Recon\.venv\lib\site-packages\torch\nn\modules\module.py", line 1736, in _wrapped_call_impl
return self._call_impl(*args, **kwargs)
File "D:\code\ABot-Recon\.venv\lib\site-packages\torch\nn\modules\module.py", line 1747, in _call_impl
return forward_call(*args, **kwargs)
File "D:\code\ABot-Recon\abot_recon\modeling\pi3\models\dinov2\layers\block.py", line 252, in forward
return super().forward(x_or_x_list)
File "D:\code\ABot-Recon\abot_recon\modeling\pi3\models\dinov2\layers\block.py", line 110, in forward
x = x + attn_residual_func(x)
File "D:\code\ABot-Recon\abot_recon\modeling\pi3\models\dinov2\layers\block.py", line 89, in attn_residual_func
return self.ls1(self.attn(self.norm1(x)))
File "D:\code\ABot-Recon\.venv\lib\site-packages\torch\nn\modules\module.py", line 1736, in _wrapped_call_impl
return self._call_impl(*args, **kwargs)
File "D:\code\ABot-Recon\.venv\lib\site-packages\torch\nn\modules\module.py", line 1747, in _call_impl
return forward_call(*args, **kwargs)
File "D:\code\ABot-Recon\abot_recon\modeling\pi3\models\layers\attention.py", line 181, in forward
x = scaled_dot_product_attention(q, k, v)
RuntimeError: No available kernel. Aborting execution.

于是让 AI 排查问题,得出以下原因:

  • Windows 版 PyTorch 2.5.1 没有编译 FlashAttention CUDA backend。
  • 代码里 FlashAttention.forward() 对 bfloat16 强制使用了 _sdpa_flash_ctx()。
  • _sdpa_flash_ctx() 只允许:SDPBackend.FLASH_ATTENTION
  • FlashAttention 不可用时,PyTorch 没有被允许回退到 math/efficient kernel,于是直接报 No available kernel。

于是它:

  • 将 bf16 的 SDPA backend 从“仅 FlashAttention”改为:[FLASH_ATTENTION, EFFICIENT_ATTENTION, MATH]
  • 在支持 FlashAttention 的环境中仍然优先使用 FlashAttention。
  • 在当前 Windows/PyTorch 环境中自动回退到可用 kernel。

加快速度

修改代码后,问题解决。不过,生成速度太慢了,4 ~ 30 s 才能处理一帧,一个快 7 分钟的 12 fps 视频,处理起来就要花六个小时。因此,还是要获得 CUDA 编译版本的 RoPE2D。还好 AI 告诉了我在 Windwos 上怎么编译,只是很麻烦。

至于文档里面提到的 flashinfer,在 Windows 上跑不通。

下载工具

首先要下载 VS 2022 生成工具。注意,一定要注意版本(2026 的不行),否则之后编译时会报错:

1
C:\Program Files\NVIDIA GPU Computing Toolkit\CUDA\v12.1\include\crt/host_config.h(153): fatal error C1189: #error:  -- unsupported Microsoft Visual Studio version! Only the versions between 2017 and 2022 (inclusive) are supported! The nvcc flag '-allow-unsupported-compiler' can be used to override this version check; however, using an unsupported host compiler may cause compilation failure or incorrect run time execution. Use at your own risk.

同时安装以下组件:

  • (工作负荷)使用 C++ 的桌面开发
  • (单个组件)MSVC v143 - VS 2022 C++ x64/x86 生成工具(v14.38-17.8)(必须是这个版本的,尽管标注不受支持。新版本的和 CUDA 12.1 不兼容。)
  • (单个组件)Windows 11 SDK(看你的系统)

以及 CUDA Toolkit 12.1。我的电脑上已经安装了 13.0,但还是要下载这个版本的。好在可以共存。安装的时候注意,只需要安装 CUDA 相关的,其他的不用安装。

安装好后,要在开始菜单中找到“x64 Native Tools Command Prompt for VS 2022”,点击进入对应环境。以下的过程都在相同的会话中运行,因为会用到临时的环境变量。

然后,因为上面安装生成工具时,安装了多个版本,所以接下来还要指定生成工具的版本:

1
2
3
4
5
cmd /k ""C:\Program Files\Microsoft Visual Studio\2022\Community\Common7\Tools\VsDevCmd.bat" -arch=x64 -host_arch=x64 -vcvars_ver=14.38"
REM 路径根据你安装 VS 的位置确定

cl
REM 输出类似于 用于 x86 的 Microsoft (R) C/C++ 优化编译器 19.38 版;版本号要小于 19.40

强制本次编译使用 CUDA 12.1

进入项目根目录,激活 Python 虚拟环境后:

1
2
set CUDA_PATH=CUDA安装位置,需要精确到版本号的目录,比如 C:\Program Files\NVIDIA GPU Computing Toolkit\CUDA\v12.1
set PATH=%CUDA_PATH%\bin;%PATH%

验证:

1
2
3
4
nvcc --version
REM 需要确保输出类似于 Cuda compilation tools, release 12.1
where cl
REM 确认 MSVC 可用

安装 Python 编译工具

1
2
3
4
5
python -m pip install --upgrade setuptools wheel ninja

REM 确认 CUDA 是 12.1 版本
python -c "import torch; print(torch.__version__, torch.version.cuda, torch.cuda.is_available())"
REM 需要确保输出类似于 2.5.1+cu121 12.1 True

编译 cuRoPE2D

1
2
3
4
5
6
7
8
cd /d 项目目录\abot_recon\modeling\pi3\models\curope

set TORCH_CUDA_ARCH_LIST=8.9
REM RTX 4060 Ti 的 compute capability

set DISTUTILS_USE_SDK=1
python setup.py build_ext --inplace
REM 编译成功后,在该目录下应出现类似文件:curope.cp310-win_amd64.pyd

验证扩展已能导入

回到项目目录后:

1
2
3
4
5
6
7
8
9
python -c "import abot_recon.modeling.pi3.models.curope.curope as c; print(c.__file__)"
REM 输出应该指向 curope.cp310-win_amd64.pyd

REM 运行官方 parity 测试
set ABOT_RECON_REQUIRE_CUROPE=1
python -m pytest -q tests\test_curope_parity.py

REM 强制后续推理使用 CUDA 版 RoPE2D
set ABOT_RECON_ROPE2D_BACKEND=cuda

之后就可以以更快速度运行了,只要确保环境变量设置了 ABOT_RECON_ROPE2D_BACKEND=cuda。实测 15 分钟就完成了之前 6 个多小时的任务。

至此,命令如下:

1
2
3
4
5
6
7
8
9
python demo.py ^
--video 视频路径 ^
--checkpoint checkpoints/abot_recon.safetensors ^
--output-dir 输出目录 ^
--attention-backend auto ^
--device cuda ^
--loop-closure ^
--save-world-points ^
--save-confidence

--video 这个参数是我让 AI 添加的。如无特殊说明,接下来的一些命令也是如此,与原版不一样。你可以在 我 Fork 的仓库的 video 分支 使用对应的代码。

--loop-closure 在序列有重访区域时可以使用。需确保有对应模型:

1
2
pip install -e ".[loop]"
python scripts/download_loop_assets.py --output-dir checkpoints/loop

预览点云场景

demo.py 生成了各种 npy 文件。通过 scripts/export_reconstruction_ply.py 能够生成点云,如:

1
2
3
4
5
6
7
8
9
10
11
python scripts/export_reconstruction_ply.py `
--poses outputs/demo/camera_poses.npy `
--points outputs/demo/world_points.pt `
--colors outputs/demo/colors.pt `
--confidence outputs/demo/confidence.pt `
--confidence-threshold 0.01 `
--max-points 200000000 `
--output outputs/demo/reconstruction.ply `
--bev-output outputs/demo/trajectory_bev.png

# --max-points 不设置似乎也有一个最大值,所以不改对应代码的情况下,还是设置一个足够大的数

但是生成的文件,我用在线的点云查看器,效果不好,并不像我预想中的能够查看第一视角的场景。
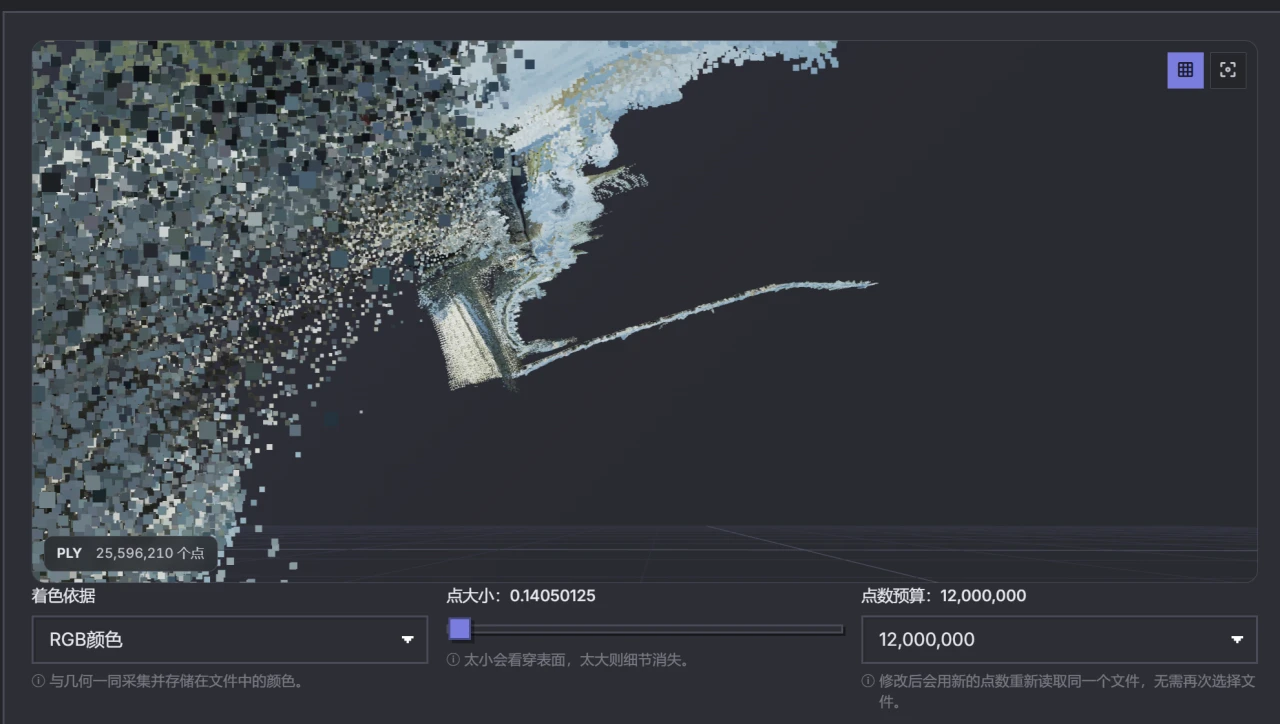
点云查看器效果

于是我让 AI 做了交互查看 + 展示行车过程的网页 Demo,也放在前面提到的 video 分支。

交互查看的使用例:

1
2
3
4
5
6
7
8
9
10
11
12
python scripts\view_reconstruction.py ^
--ply outputs\demo\reconstruction.ply ^
--poses outputs\demo\camera_poses.npy ^
--mode drive ^
--voxel 0.01 ^
--point-size 2.0 ^
--start-frame 200 ^
--stop-frame 2000 ^
--frame-step 2 ^
--playback-fps 12 ^
--zoom 4.0 ^
--camera-offset 0 0 0

参数:

1
2
3
4
5
6
7
--voxel 0.10        # 更精细,但点更多
--voxel 0.25 # 更干净,但细节更少
--point-size 1.0 # 点大小
--background light # 白底
--camera-offset 0 -2 -10 # 表示相机在原行车视角基础上:右移 0,上移 2(因为程序内部 Y 轴向下),后退 10
--frame-step 2 # 每次跳过多少原始帧
--playback-fps 12 # 播放帧率

它提到了高斯泼溅,但是追问才发现,高德的这个工具并不是为高斯泼溅准备的,只用它的生成结果只能搞搞伪高斯泼溅:

  • 把点变成带 opacity / scale / quaternion 的 Gaussian
  • 用 SuperSplat 或本地 WebGL viewer 查看
  • 不需要原始视频
  • 很快就能看到“泼溅渲染风格”
  • 但它不是真正从图片训练出来的 3DGS,只是点云的高斯化显示

不过还是能搞的。于是之后就让它这么干了。

需要先把现有 RGB 点云转换成标准 3DGS PLY 结构:

  • 每个点变成一个 isotropic Gaussian
  • 保留 RGB 颜色
  • 写入 f_dc、opacity、scale、rot
  • 支持 voxel 降采样
  • 输出标准 Gaussian Splat PLY

命令如下:

1
2
3
4
5
6
7
python scripts\export_pseudo_gaussian_ply.py ^
--input outputs\demo\reconstruction.ply ^
--output outputs\demo\pseudo_gaussian.ply ^
--voxel 0.01 ^
--radius 0.01 ^
--opacity 0.9 ^
--max-points 1500000000

对应的网页预览放在了 tools/pseudo_gaussian_viewer.html,需要打开服务器浏览。
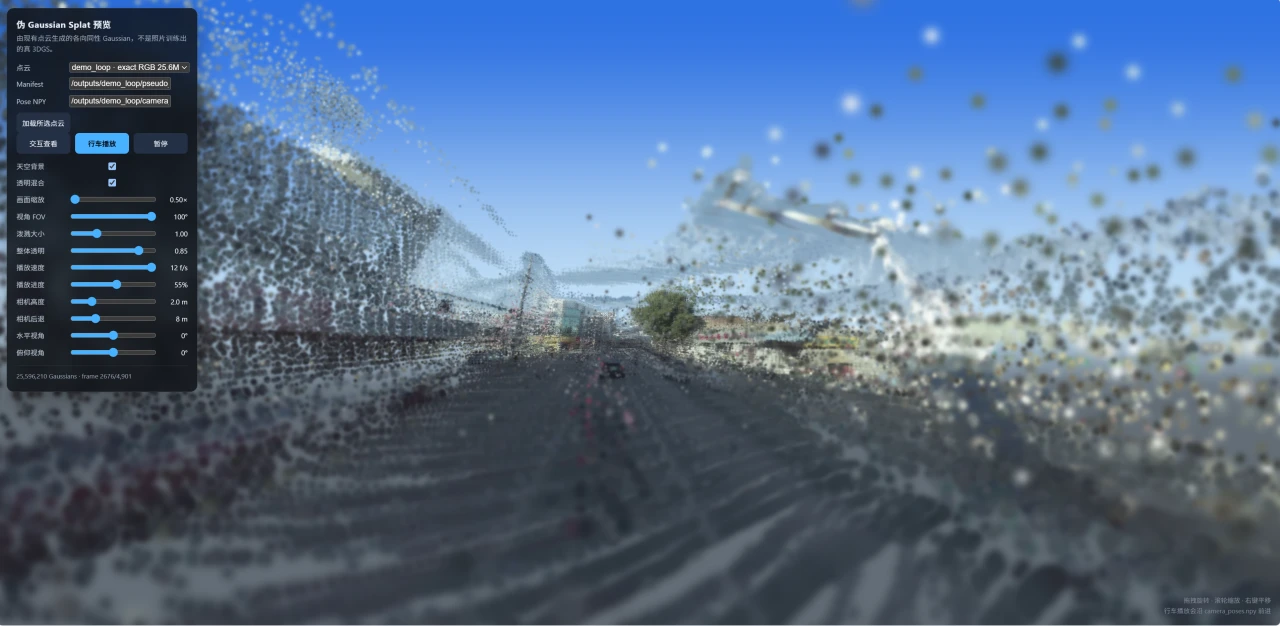
伪高斯泼溅预览,使用行车视角

我对这结果不满意。看到官方的演示中,能够看到比较模糊的交通标志信息。于是我让 AI 又做了类似于官方示例的效果 tools/point_cloud_viewer.html:
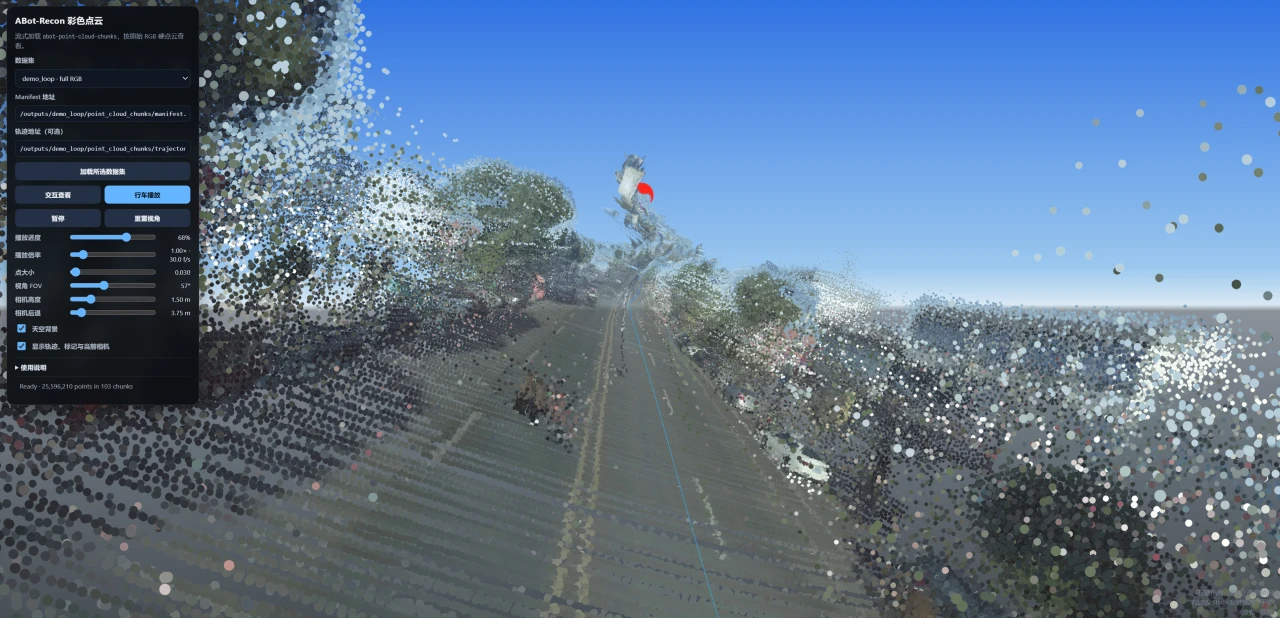
参照官方演示的更改,使用行车视角

尽管做了很多调整,但是这个工具应该不适合我。